Showing posts with label Trendy Tags 2. Show all posts

CSS Release Day! Week 3...

Saturday, January 19, 2013


Hello!  I hope you are having a great weekend so far!  Clear & Simple Stamps is releasing some super fun items this weekend, including stamps and dies.  One of the newest stamp sets is called Air Mail and is so versatile.  You'll see!  I used it to create the above ensemble.  Let's take a closer look.  

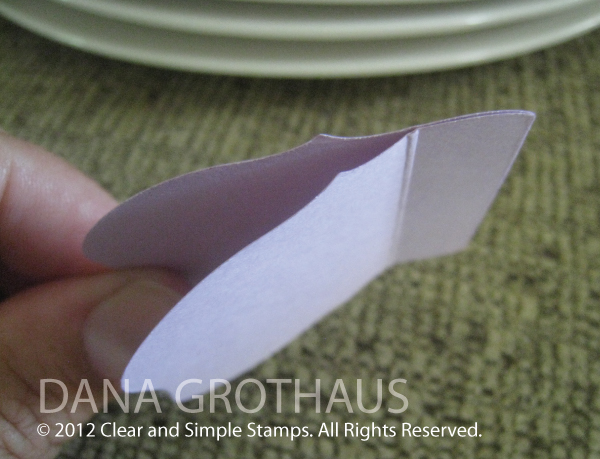
I started with a kraft card base and stamped those "short diagonal lines" around the perimeter of the card and then the "Air Mail/Fragile" wording along the upper right and lower left hand sides.  Check out that cute envie!  It's a new die called Tiny Note + Envie.  I used vellum so you would be able to see the heart through the envie.  
I adhered the envie to the card with foam dots and then stamped the sentiments in black.
The heart is removable, making this card interactive.

For the favor, I used the same stamps as I used on the perimeter of my card.  The favor was made using the Party Favor 1 die and kraft card stock.   I made a tag by punching a small hole in the "tiny note" from Tiny Note + Envie dies.  I used the "to and from" stamp from Trendy Tags 2 and the heart is from Love Cupid.


I cannot wait to see what the other ladies created!  They are always such an inspiration!!!


Have a great day!


{Sending You My Love + Favor}
Stamps: Air Mail, Love Cupid, Trendy Tags 2 (Clear & Simple Stamps)
Card Stock: Kraft Like a Rockstar, Dare to Be a Diva Red (CSS)
Ink: Perfect Little Black DressDare to Be a Diva Red (CSS)
Dies: Tiny Note + Envie, Party Favor 1, Shapes: Hearts (CSS)
Accessories: Red/White Twine (CSS), Foam Dots, Vellum


Read more...

A {Happy 5th Birthday} Card...

Thursday, January 3, 2013

Hey there!  Sunlight was not on my side when I took this photo today.  The sun was out in full force so that's why my card has some shadows.  I think you can get the gist though.

My card is a CASE of this card I found on Pinterest.  I loved the layout and tried to recreate it based on the supplies I have on hand.  This card is for my nephew, so I wanted to keep it as boyish as possible.
Here's a close-up of the center panel.  Ugh, those shadows.

Have a great day!

{Happy 5th Birthday}
Stamps: Background Basics 1, Number Blocks, Circles Plus, Trendy Tags 2 (Clear & Simple Stamps)
Card Stock: A Blanc Check, Such a Gray-cious Host, Trendsetter Blue, Dare to Be a Diva Red (CSS)
Ink: Dare to Be a Diva Red, True Blue Fan (CSS), White
Dies: Numbers, Tags 2 (CSS)
Accessories: Navy Blue/White Twine (CSS), Foam Dots, Circle Punch

Read more...

CSS Release Day: Perfect Harvest

Sunday, October 14, 2012


Today Clear & Simple Stamps is releasing some super yummy sets!  The collection is called Perfect Harvest and includes lots of fruits, veggies, sentiments, and coordinating dies.  As you can see from my project above, I really had fun with all those fruit images.  I made a card and tag combo!
Here's my card!  I used a new background stamp called Distressed Linen.  I die cut all the fruit before I stamped the images on them.  Most of these stamps are two or three step stamping, which allows you to add more color to your image easily.  For example, the pineapple is three stamps. Each color is a different stamp.  I love that!
Once all the fruit was cut and stamped, I arranged them on the card base using varying heights of foam dots.  The "platter" is a Word Window die.  The words "Organic Thanks" comes from two different sets (Trendy Tags 2 (older set) and Well Preserved (more details on that tomorrow).  The sentiment is stamped on a die cut circle that I cut in half.

I didn't want the tag to be match-matchy with the card, but I did want them to have similar elements.  I used the larger Labels 5 die to create the tag base, just cut two shapes and adhered the two at the top.  I used the same Distressed Linen background stamp.  I pulled the purple color from the grapes and the red inked sentiment from the apple of the card.  I also used a full circle, instead of the half circle on the original card.
 This is such a fun release day, I can't wait to see what my fellow designers created!  I hope you'll check them out too!


Have a great day!

Read more...

CSS's Simple Cuts & WCMD!

Saturday, October 6, 2012


Hello there!  Hope you are having a great Saturday!  In celebration of World Card Making Day, Clear & Simple Stamps has just released some new dies that coordinate with some popular older sets.  Today I'm sharing a card I made using the newly released dies for A Guy Thing.

First, I took the blue panel, a ruler, and pencil and marked where I wanted the ties.  The panel is 4" so I made a mark at 1", 2", and 3".  That's how I was able to line up the tie die up so perfectly.  When you need to use a die in an exact place, I always use masking tape to hold the die right where I need it as it goes through my Cuttlebug.  

Now for the fun part!  I had so much fun with these ties.  I used a "kissing" technique for the designs on the ties.  If you are not familiar with this technique, I'll try to explain.  First, start off with a solid image stamp like the solid tie from A Guy Thing.  Next, pull out some stamps that have fun patterns on them, in this case I chose some designs you might actually find on a tie.  What you do is ink up your solid image stamp (tie), then press it against the patterned stamp (kiss them together!), this will cause the ink to be removed from the solid stamp, leaving the patterned design on the solid stamp.  Then stamp on your project.   

I hope you were able to follow that!
Check out the Clear & Simple Stamps Blog to check out the other dies that are being released and links to projects from the other design team members.  

Be sure to stay tuned next week for the official Collection 5 release kicking off October 10th!!!

Have a great day!

{Happy Birthday}
Stamps: A Guy Thing, Trendy Tags 2, Designer Lines (Clear & Simple Stamps)
Card Stock: Trendsetter Blue, Kraft Like a Rockstar, Your Style Blue Me Away (CSS)
Ink: Your Style Blue Me Away (CSS), White
Dies: A Guy Thing (CSS) 
Accessories: Corner Rounder Punch, Foam Dots

Read more...

Clear & Simple Stamps: Party Hop!

Saturday, August 11, 2012

Hi there!  Welcome to this month's Clear & Simple Stamps Party Hop!  This month the design team and I are using a brand new stamp set called Party Elements: Celebration (available to order today!).  This set can be used to create invitations for a wide array of events.  The theme I chose is pool party!  

Here's my ensemble, complete with a party favor treat bag.
The colors I chose were really a no-brainer for a pool party. I picked Simply Blue-tiful and Your Style Blue Me Away for my color palette.  I lined all the word stamps up on my clear block so I could create the invitation with just one stamp impression, what a time saver!  Then I added the banner at the top and bottom.    
These invitations really came together fast, but you would never know it by how professional they look.   I was able to make a stack in just a few minutes once I got the design down.
This candy treat bag completes the look.  I carried over the colors and the banner image.  The stamped the bag before I assembled it, so much easier that way!  The bag uses the Party Favor 1 die.  I added two tags stamped using an image and sentiment from Trendy Tags 2.  The tags themselves are were cut using Tags 2 dies and then attached to the bag using Bright Blue/White Baker's Twine.

So many designers are joining us for the Party Hop!  Be sure to stop by and see all the great creations using Party Elements: Celebration.


Have a great day!

{Splish Splash}
Stamps: Party Elements: Celebration, Trendy Tags 2 (Clear & Simple Stamps)
Card Stock: A Blanc Check, Simply Blue-tiful, Your Style Blue Me Away (CSS)
Ink: Your Style Blue Me Away, Simply Blue-tiful (CSS)
Dies: Tags 2, Party Favor 1(CSS) 
Accessories:  Bright Blue/White Baker's Twine (CSS), Sticky Tape

Read more...

CSS Release Review Day 3...

Tuesday, August 7, 2012


Hello!  It's day 3 of Clear & Simple Stamps release in review!  I have a really cute card/tag to share with you today.   It's soooo simple, I think that's why I like it so much.  Too bad the creative process wasn't fast and simple, but now that it's come to fruition, it'll be super fast and simple for you to recreate!
These two greens (Glamazon Green & Green With Envy) make one of my most favorite color combos.   So, my card base is 3" x 3" and I used the die from Tags 2 for my Green With Envy tag.  I stamped the tag with an image from Trendy Tags 2 using Glamazon Green ink.  

The banner is sort of a fake out!  It looks like one of those folded banners, but this version is sooo much easier.  Check out the close-up below for a visual picture, but I'll explain it too.  I took a skinny piece of A Blanc Check card stock, I trimmed it to the width of the card, added the cuts to make it look like a flag banner, then I adhered it under the tag.  At this point I adhered the tag panel to the card using foam dots.  I took the leftover piece of A Blanc Check card stock, trimmed it to a little wider than the tag, stamped my sentiment (also from Trendy Tags 2) and adhered it to the tag using foam dots.  Sounds complicated, but really super easy! 
You won't want to miss what the other ladies of the CSS DT created using Tags, Toppers, Edgers and Borders!


If that wasn't enough excitement, I have a project featured on the Clear & Simple Stamps App for the iPhone!
Have a great day!

{Please Take One}
Stamps: Trendy Tags 2 (Clear & Simple Stamps)
Card Stock: Glamazon Green, A Blanc Check, Green With Envy (CSS)
Ink: Glamazon Green (CSS)
Dies: Tags 2 (CSS) 
Accessories: Foam Dots

Read more...

A {HB2U} Card...

Monday, July 23, 2012


Hey there!  I hope you are all having  a good summer.  I've been busy spending as much time with the kiddos as I can before I send them back to school.  I've been really making an effort to get out and do things and keep them active.  It's been busy, but fun!  One of our new favorite activities is riding bikes. All four of us have a bike and the kids are riding on their own.  It's so fun riding as a family.

So, I have a fun card for you today.  This card came together quickly due to the large background I created with a stamp from Background Basics 2.  I just love graphic images, they pack so much punch.
After the background was finished, I added a flag sentiment strip topped with a flower from the same Background Basics 2 set.  I love the pop of yellow and green!


Have a great day!

{HB2U}
Stamps: Background Basics 2, Trendy Tags 2 (Clear & Simple Stamps)
Card Stock: Such a Gray-cious Host, A Blanc Check (CSS)
Ink: Perfect Little Black Dress, Glamazon Green, Say Yellow to All Your Fans (CSS)
Accessories: Hole Punch, Foam Dots (CSS)

Read more...

CSS Group Project: Xmas in July!!!

Tuesday, July 17, 2012


Hey there!  Today the Clear & Simple Stamps Design Team and I are celebrating Christmas in July!  About this time of year is when most scrappers and card makers start to work on their annual holiday cards.

Using the new stamp sets that were just released, I wracked my brain to somehow come up with a Christmas card even though none of the sets I chose had anything remotely Christmas-y.  Somehow this idea of taking an image from Background Basics 2 popped into my head and it was perfect!  I used the criss-cross image that has five crosses, I stamped it in green five times, and cut out the appropriate amount of crosses and then a brown one for the tree stump.  I love how this turned out, especially after adding the yellow sunburst behind the tree instead of a star on top of the tree.
 Here's the card by itself...
 And here is a cute treat bag I made with tags using the same stamps, just in a different way.
I can't wait to check out what the rest of the design team created!  You can check them out here:


Have a great day!

{Merry Christmas}
Stamps: Background Basics 2, Trendy Tags 2, Holly Jolly, Sunburst (Clear & Simple Stamps)
Card Stock: Kraft Like a Rockstar, Glamazon Green, A Blanc Check (CSS)
Ink: Glamazon Green, Say Yellow to All Your Fans, Dish All the Dirt Brown, Dare to Be a Diva Red (CSS), White
Dies:  Tags 2, Party Favor 1 (CSS)
Accessories: Red/Green/White Twine, Foam Dots, Edge Distresser

Read more...

CSS Release Day! Shapes!

Sunday, July 8, 2012


Clear and Simple Stamps is releasing even more stamp sets today!!! Today they are all revolving around the theme of shapes and backgrounds.  My project today uses the new set Mini Squares with new Shapes: Square Combo (Stamps & Dies) and the sets Trendy Tags 2 and Tags 2 Combo that was released yesterday.  I created a get well card along with a can of No Chicken Noodle Soup, perfect for someone feeling under the weather.

The gray/light blue/orange color combo came from a baby nursery I saw on Pinterest.  For my card I simply die cut 9 squares using the new Shapes: Squares Combo Dies, stamped 8 of them using 4 patterns from Mini Squares and the 9th square I stamped with an open image from the same set.  Then I used the sentiment "feel better soon" from the Trendy Tags 2.
For the tag, I die cut the large and small tags from Tags 2 Combo and stamped one with a sentiment and the other with a pattern from Trendy Tags 2.  I just LOVE that chevron tag stamp.  Of course I had to attach is to the soup can with some matching twine, the perfect touch!
We have a lot of designers showing off their fabulous creations today using the new shapes and backgrounds sets.  You won't want to miss this inspiration:


Have a great day!

Read more...

CSS Release Day! Tags!

Saturday, July 7, 2012


Hello!  It's the 3rd day of releases at Clear & Simple Stamps and I'm showcasing the new Trendy Tags 2 set.  I wanted to show how these tags can be used for more than just tags.
I die cut the tags on VIP Purple card stock four times using the new Tags 2 Combo dies, stamped them each with a different pattern using Purplicious ink, sponged the edges and then applied them to the Purplicious card stock panel.  You'll notice one of those patterns isn't released today, you'll have to wait for tomorrow for the link to work ;) --it's one of my favs from this release!
Onto the place cards!  These came together so quickly with the use of the Combo 2 Tags dies.  I was making 4 place cards, so I cut 8 tags (4 fronts, 4 backs).  I stamped on the 4 fronts and then scored the 4 backs about .5" from the top.  Apply adhesive just above the score line and then press the front and back together.  Easy peasy!
I hope you are keeping up with all the exciting things happening with Clear & Simple Stamps!  You can also follow them on Facebook and Twitter so you won't miss a thing!

Check out these fantastic ladies that are showcasing Tags, Edgers, and Borders:


Have a great day!


{Thanks For Being Here}
Stamps: Trendy Tags 2, Sunburst (Clear & Simple Stamps)
Card Stock: A Blanc Check, Purplicious, VIP Purple (CSS)
Ink: Purplicious (CSS)
Dies: Tags 2 Combo (CSS) 
Accessories: Stamping Sponge

Read more...
Related Posts with Thumbnails

  © Free Blogger Templates Columnus by Ourblogtemplates.com 2008

Back to TOP