Clear & Simple Stamps: App Sneak Peek...

Saturday, July 30, 2011

Hey guys!  Just a quick note.  Today I have a card featured on the Clear & Simple Stamps APP for the iPhone. For details about the app, click here.  Here's a little peak at my card:
Have a great day!

Read more...

A {Get Glammed Up} Card...

Friday, July 29, 2011

 
Happy Friday!  I have fun little number to share with you today.  This card was created using the new stamp set of the month (Beauty Secrets II) by Clear & Simple Stamps.  I've really started to like coloring with my copic markers.  I don't have many trios yet, but I'm having a good time with the ones I do have.  

The kraft card base uses two Labels 9 (Spellbinders) die cuts, they are adhered together at the top.  I used the a smaller Labels 9 die for the patterned paper.  I stamped the cosmetics image on A Blanc Check card stock using A Perfect Little Black Dress ink.  I colored the image with copics making sure to outline the image as well.  I cut it out with scissors and adhered it to a pink oval die cut using foam dimensionals.   
I really like the sentiment placement.  There really wasn't anywhere else to put it, but I like that it's over the image but not really covering up anything important.  

Hope you all have a great weekend.  We have a busy one coming up.  The end of July and the beginning of August is filled with birthdays.  My daughter's was earlier this week and mine is tomorrow.  Throw in a brand new nephew and things are getting interesting.  It's going to be fun though.  Have a great day!   

{Get Glammed Up}
Stamps: Beauty Secrets II (Clear & Simple Stamps)
Card Stock: Kraft Like a Rockstar, A Blanc Check, Paint the Town Pink (CSS)
Patterned Paper: Gertie (My Mind's Eye)
InkYour Style Blue Me AwayPerfect Little Black Dress (CSS)
AccessoriesFoam Dimensionals,  Oval & Labels 9 Nesties (Spellbinders), Pink Rhinestone, Brown Marker, Stamping Sponge
Copic Markers: B93, B95, B99, W3, 0 Colorless Blender, 100 Black

Read more...

A {Welcome Baby Grant} Card & Gift Set...

Thursday, July 28, 2011

Hello!  I'm so happy you stopped by today so I can tell you all about my nephew that was born this morning. My SIL was supposed to be induced this morning but the baby couldn't wait that long.  My SIL went into labor last night and had the baby at 4:49 this morning.  I didn't even know she went into labor last night and woke up to a text from my brother saying baby Grant had arrived!  Such a great way to start my day.

So of course we headed to the hospital as soon as we were given the go ahead.  I had Grant's gift all ready but I still needed to make a card.  I've known the baby's name for months so you would have thought I would have had a card made ahead of time, but I didn't.
I love to make cards, but I especially love to make cards when I'm making them for a specific person.  It gives me such a warm feeling while I'm making it and knowing who will see it and how they will feel knowing I made it especially for them.  In this case it was Grant's parents since Grant is, well, a baby.
I know glitter is probably considered girly, but in this case it just shows how excited I was.  I wanted to glitter everything.  Note: When you use glitter expect to have some on your face here and there until your next shower.  


Since Grant is my brother and SIL's second child, there were no showers or registries.  I wanted Grant to have something special so I learned how to crochet so I could make him a baby blanket. Thank goodness it takes 9 months to have a baby because it took me a long time to get crocheting down.  I started his blanket on May 21st and finished it on July 4th.  When I worked on it I would always think about Grant using the blanket and the life he has ahead of him.  Needless to say, I loved working on his blanket.
Now, I don't really know how to properly photograph a blanket so I just laid it on my bed (artfully?).  It is a little larger than a regular baby blanket.  It's pretty thick and soft, very flexible and not stiff at all.

This is something my family calls a love-y.  It's a little blanket (about 1' x 1.5') that babies sleep with.  They usually get attached to it have to sleep with it all the time.  I hope he likes Aunt Dana's love-y.  It is super soft like a stuffed animal.  The material was hard to work with, but I love how it turned out.
And here they are all wrapped up before I put them in the gift bag.  Presentation is everything!
I wouldn't be a good aunt if I didn't share a couple pictures of the little guy.  


Thanks so much for stopping by!  Hope you didn't mind my gushing too much.  See you tomorrow!!!

{Welcome Baby Grant}
Stamps: Fresh Alphabet, Whale Wishes (Papertrey Ink)
Card Stock: Kraft Like A Rockstar, Green With Envy, Glamazon Green, A Blanc Check (CSS)
Ink: Your Style Blue Me Away, Green With Envy (CSS)
Accessories: Sticky Tape, Glitter, Foam Dimensionals, Corner Rounder Punch, Edge Distresser

Read more...

Papertrey Ink: Stamp-A-Faire

Tuesday, July 26, 2011


Stamp-a-faire-2011-logo-web
Hi guys!  It's about time I posted about the Papertrey Ink Stamp-A-Faire, right?  I will warn you, this post is going to be long and pretty much all about me, me, me.  Let's get started!


ETA: Just a little something I learned: If you are expecting to meet people that know you from your avatar/profile picture, don't drastically change your look a week before meeting them (for example dying your hair from blond to black)  And yes, I know this from personal experience.  Check out my profile picture on the right side of my blog and then check out these photos, he he.


The day started on a bad note when I woke up late, but thankfully my husband noticed and I was able to get up and out of the house on time.  Once I got over that it was smooth sailing.  I arrived at my sister-in-law's house at 8:00 along with our scrapping buddy, Katie.  We made the 15 minutes trek to downtown Cincinnati to the convention center.  It's quite funny that we drove 15 minutes because there were people from all over the country, and a few from out of the country.    Papertrey Ink has quite the following.

We hauled our supplies into the convention center, checked in and found our table for the day.  Here's a picture of use girls, right to left it's me, Carrie (my SIL), and Katie.  At check-in we were given a very generous goody bag.  It included three stamp sets (one of which was the special edition set for the event), 2 pads of patterned paper, a note pad, and a bunch of papercrafting odds and ends like flowers and brads.
Here's a little glimpse of the room.  It accommodated seating for 200 stampers, 5 make-n-take areas, a retail area and many displays of cards using Papertrey Ink stamps and supplies.  

Here's the shopping area.  My photo doesn't do it justice.  Is was striking to see all the colors lined up together.  
The day started off with Nichole welcoming everyone and laying out the schedule of the day.  There were 5 make-n-takes in the morning and 5 in the afternoon.  Each make-n-take was led by one of the Sr. Design Team members.  The design team did not disappoint.  They were as lovely and kind as expected, but they were hilarious as well.  It was such a fantastic day.  
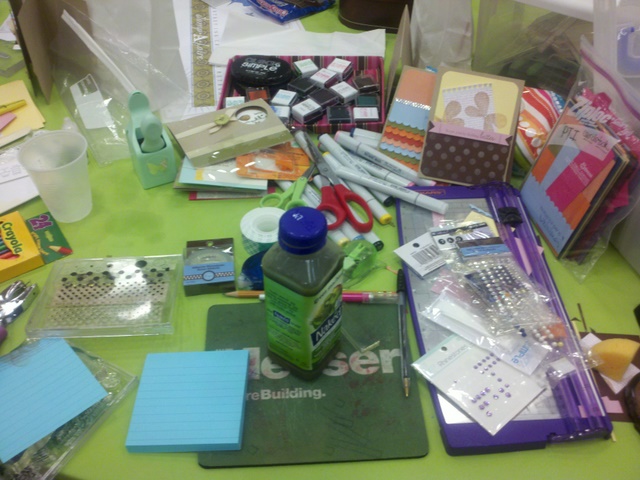
My stamp area, messy as always.

In between the make-n-takes we had some time to work at our table on whatever we liked.  I think I made four or five cards.  We spent a lot of time chatting and looking at the card displays.  Here's some of photos of card I took.  I've seen almost all of these online but it was really neat to see them up close in real life.


(click to enlarge)
Here's Heather Nichols in action at one of the make-n-take stations.  

When you finished a make-n-take card you received a stamp from the design team member for your passport.  I had them autograph all of mine, *squeal*!

We had a four hour break for dinner.  We went to eat at Rock Bottom Brewery and then for coffee at Starbucks.  We went back to the convention center at 9pm for a dessert reception.  That's where I was able to get my picture taken with all of the Design Team members.  Unfortunately a couple of them are blurry, but that's okay since I'll remember it forever.  
Me & Betsy Veldman
Me & Dawn McVey
Me & Lisa Johnson
Me & Heather Nichols
Me & Michelle Wooderson
Me & the Design Team
*squeal*
My fellow Clear & Simple Stamps design team member, Amber Daigre was there.  We've never met before, so that was super fun.  I also met a few people that I knew by name, but not by face.  I'm really good at remembering names, but not faces.  There were a few names I recognized from seeing there cards in magazines.  I even met a few people that had heard of me and my little blog.
Me & Amber Daigre
(fellow Clear & Simple Stamps Design Team member)
Me & Leigh Ann Baird
(She gave me some wonderful advice, hope it pays off *wink,wink*)

Dawn McVey wrote me a little note, it says "Dana, Loved spending the day with you! XO, Dawn McVey".  Betsy Veldman's autograph is there too.  So fun!  
Well, that's pretty much my day.  It was absolutely everything I thought it would be.  As always, Papertrey Ink thinks of everything and it's so well planned out. My only disappointment was that I didn't get my picture with Nichole Heady (or her autograph) but she was super busy coordinating things and being a super hostess.  I'll be back next year for sure, and I know I'll get a photo then.

Have a great day!


PS.  A shout out to some of my new friends: Deana Woodland, Maria Fiscella, Avril Tanner, Regan D'Agostino, Leigh Ann Baird, and Suzanne Dahlberg.  Hi girls!
PSS.  I'll share the make-n-takes tomorrow and I'll be sharing the cards I made in my free time over the next week or so.  

Read more...

A {Congrats} Card...

Friday, July 22, 2011

Here's a quick and fun card I made this morning.  This was my last before packing up my desk and loading up my tote for Papertrey Ink's Stamp-A-Faire.  I'm so excited, can ya tell?


This is a one layer card stamped using a trio of brightly colored inks.  I was somehow able to find coordinating thread in my stash.  I punched little notches with my hole punch to keep them in place.  I really love how it turned out.  I used my very favorite PTI stamp set, Signature Greetings designed by the one and only Dawn McVey, and I'll be hanging out with her tomorrow!!!
I'm all packed and ready to go!  I can't believe I was able to fit everything in there.  The only problem is that I haven't planned anything out.  I have no idea what I'm going to work on.  
Maybe I'll come up with a plan tonight.  I can't believe I'm not going to see my kids for a whole day.  I'll be leaving before they wake up and getting home after they are in bed.  That usually only happens when my husband and I go out of town, not when I'll be 25 minutes away.  


I'm hoping to get a good cell signal at the convention center so I can tweet throughout the day.  Follow me on Twitter by clicking here and then click the "follow" button.  My twitter feed is also on the right hand side of the blog.  Either way I'll be sure to take a bunch of pictures to share on Monday.


Have a great weekend!

{Congrats}
Stamps: Signature Greetings, Chevron Stripes (Papertrey Ink)
Card Stock: SS White (PTI)
Ink: Green With Envy, Coral Necklace, Simply Blue-tiful (CSS)
Accessories: Embroidery Floss, Corner Rounder Punch

Read more...

A {Get Well Soon} Card...

Thursday, July 21, 2011

Hey there!  I thought I would give this week's CPS Sketch a try although you know how much I despise diagonal lines.  Making the diagonal  panel in the background was pretty easy since I used a double sided piece of patterned paper.  I simply cut a 4" x 4" square, cut it in half diagonally and then flip one of the halves over.  I matted it on a piece of 4.25" square piece of card stock.
I created the flower by punching three scalloped circles out of patterned paper, stacking them on top of each other and then using scissors to cut a straight line toward the center to create petals.   I puffed up the flower a little to give it some dimension.

Tomorrow is going to be a busy day.  I'm packing up all my scrapping supplies to take to the Papertrey Ink Stamp-A-Faire.  I can't wait to spend the day with my sister-in-law, friend, Nichole Heady, and some of the PTI Design Team.  It's going to be a fun day.  I know I'll have loads to share with you next week.

Have a great day!

{Get Well Soon}
Stamps: Communique Sentiments (Papertrey Ink)
Card Stock: Kraft Like a Rockstar, Simply Blue-tiful, On the Catwalk Cream (CSS)
Patterned Paper: Hattie (My Mind's Eye)
Ink: Simply Blue-tiful (CSS)
Accessories: Stamping Sponge, Foam Dimensionals, Edge Distresser, Buttons, Glue Dots, Scalloped Circle Punch (SU)

Read more...

Another {Friendship} Card...

Wednesday, July 20, 2011

Hello!  So glad I procrastinated working in my studio  today.  I waited just the right amount of time,  time for the UPS man to deliver some new card stock.  I cannot believe I let myself run out of kraft and white card stock.  Seriously, it was a bad situation.  I've been using colored card stock for my card bases and using scraps of white and kraft.  I ordered two packs of each plus some other goodies.  I ordered a new-to-me color from Clear & Simple Stamps.  It's called Coral Necklace and I think it's going to be my new favorite color.  It's between hot pink and red.  It's such a deep pink, I love it.  Oh, and I used on today's card :)

I actually thought of this card while I was taking a mid-morning nap, both of which don't happen very often.  I stamped the flower on cream card stock and sliced it into four pieces.  I mounted the pieces on a square of Coral Necklace card stock.
The center of the flower is just a circle punched from Coral Necklace card stock and then covered with an epoxy sticker, then popped up on a foam dimensional.  The sentiment is just a strip of card stock that was slid through a circle punch to round the ends.  

Thanks so much for taking the time to see what I've been up to!  Have a wonderful day!!!

{Friend}
Stamps: Friends 'til the End (Papertrey Ink)
Card Stock: Kraft Like a Rockstar, On the Catwalk Cream, Coral Necklace (CSS)
Ink: Vintage Cream (Papertrey Ink), Coral Necklace (CSS)
Accessories: Circle Punches (SU), Foam Dimensionals, Epoxy Sticker

Read more...

A Simple {Friendship} Card...

Tuesday, July 19, 2011

Hello!  Today I thought I'd try a new technique that I hadn't heard of before watching the Make-It-Monday video yesterday on Papertrey Ink.  It's a technique called dry brushing.  The video shows paint but as says you can use ink, which is what I used.  I simply inked up my brush and lightly painted the white ink on the card starting from the edge dragging the brush to the center of the card.  I stamped the white chevron stripes before I did the dry brushing.

To make the flower, I used a scalloped circle punch and used scissors to cut a spiral to the center of the circle and then rolled it from the outside to the inside.  It's adhered with glue dots and then I added the black brad to sort of ground it.
You can see the edge of the card where I did the dry brushing technique.  I think it gives the card a sort of shabby chic feel.  What do yo think?

Have a great day!

{There's no one like you}
Stamps: Friends 'til the End, Chevron Stripes (Papertrey Ink)
Card Stock: Pain the Town Pink (CSS)
Ink: Fresh Snow (PTI)
Accessories: Scallop Circle Punch (SU), Black Brads (Making Memories), Paint Brush, Glue Dots

Read more...

A Rainbow {I Love You} Card...

Friday, July 15, 2011

As you can see I'm still on my rainbow kick.  This card came together pretty quickly.  I stamped the lines of hearts first .  The circle and hearts were punches, so that was really quick.


When I was finished with this card I noticed I forgot the sentiment.  Eek!  Since the whole layer was already popped up on foam, I knew it was going to be tricky to stamp the sentiment.  My solution was to stick a ruler under the white card stock (luckily there was not any foam there) and then I was able to stamp the sentiment with something solid underneath.  

Have a great weekend!

{I Love You}
Stamps: Love Notes (Clear & Simple Stamps), Around & About Sentiments (Papertrey Ink)
Card Stock: Your Style Blue Me Away, A Blanc Check, Dare to Be a Diva Red, Green With Envy (CSS)
Ink: Dare to Be a Diva Red, Green With Envy, Your Style Blue Me Away, VIP Purple (CSS)
Accessories: Blue Rhinestones, Baker's Twine, Foam Dimensionals, Cirle Punch, Heart Punches

Read more...

A Colorful {Have a Lovely Day} Card...

Thursday, July 14, 2011

Hello!  I made this card pretty early this morning and just kept getting distracted.  I'm glad I'm finally getting around to posting it.   I've been seeing a lot of rainbow cards lately and thought I would give it a try.  My intention was for the stripes to be narrower and only go across the bottom part of the card.  I cut my strips too wide.  It all worked out in the end though.

I don't know if you noticed, but my rainbow stripes are arranged like a real rainbow (I still remember the acronym Roy G. Biv from grade school to remember the order).  I used some sticky tape and glitter for the glitter-y strip above the red stripe.
I love my tiny bow!  It's threaded through a red button.  How could someone not have a lovely day after receiving this card?  It's so bright and cheery!


Have a great day!

{Have a lovely day}
Stamps: Beauty Secrets II (Clear & Simple Stamps)
Card Stock: A Blanc Check, Dare to be a Diva Red, Orange You Fabulous, Say Yellow to All Your Friends, Glamazon Green, Trendsetter Blue, Your Style Blue Me Away, VIP Purple (CSS)
Ink: Dare to be a Diva Red (CSS)
Accessories: Red Button, Corner Rounder Punch, Sticky Tape, Iridescent Glitter, Glue Dots, White Sheer Ribbon (Offray) 

Read more...
Related Posts with Thumbnails

  © Free Blogger Templates Columnus by Ourblogtemplates.com 2008

Back to TOP