Hello! I wrote this tutorial for the Paper Maniac Newsletter and thought I would post it here. There is also a bonus idea at the very end. Enjoy!!!
 This is an easy ornament to make with your kids. In fact, that’s how I came up with this idea to begin with. Both of my kids needed an ornament for their classroom tree last year and of course they needed them the next day. I made one first, and then gave them the supplies and they copied mine. I hope you enjoy this tutorial and get to make a few of these with your kids. The finished ornament can be easily attached to a tag or on a card.
 Supply List:

Floss or String
3 Squared of Patterned Paper (the paper I used came for the Basic Grey Collection Nook & Pantry)
Snail Adhesive
½” Strip of Brown Card Stock about 6” long
Star Sticker
Directions:
-Apply adhesive to the backside of squares and fold to form 3 triangles.


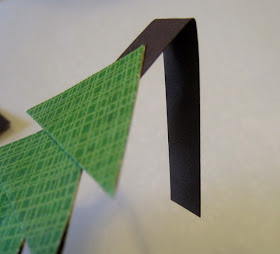
-Arrange triangles on brown cardstock as shown to create tree and trunk. Glue into place.

-Take the excess brown card stock at the top and fold it over to create loop.


-Thread the floss or string through the loop and tie. Place the star atop the tree. Use the string to hang the ornament on your tree.

Now, here's a bonus idea. I took the ornament and used it as an embellishment on a 3" x 3" tag. Perfect to accompany a gift. You just peel the tree off and use it as an ornament on your tree. The string is rolled up behind the tree.


Very cute tree, really like how you constructed it. And it looks great on the card too.
ReplyDeleteme like this!! Very cute and easy to follow "how to"!
ReplyDelete